- Print
- DarkLight
- PDF
Overview of Branded Custom Tab to Access Send360
Send360 customers using our platform to deliver their corporate library of Print/PDF/Direct Mail/Gifting/Social collateral often want to brand and customize their employee or partner experience by adding a custom Salesforce tab or button used to access Send360 - and named to their choosing - instead of using the out of the box "Send360" tab to provide access to our platform.
For example, a customer may want to label the tab accessing Send360 as "Print & Mail" or "Collateral Center" or "Print/Mail/Social". This Visualforce tab is then included in a custom "App" (ex: "Cumulus Sales Center" or "Cumulus Marketing") as one option and resource among several which meet the full breadth of the team's needs.
Below shows an example custom Visualforce tab:

This is all doable by adding a custom Visualforce tab which calls Send360 - rather than using our out of the box "Send360" Visualforce tab, and as detailed below.
Create a Custom Visualforce Tab to Access Send360
Within Salesforce, go to Setup and search for "tab" then select User Interface > Tabs.
Scroll down to the Visualforce Tabs panel, and click NEW.
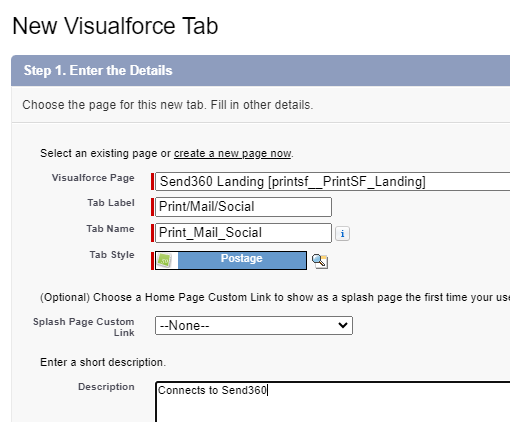
Select a target Visualforce page of "Send360 Landing"
Enter your desired tab label and name, such as "Print & Mail", and select your desired Tab Style. Optionally enter a description, such as "Connects to Send360".

Continue to Step 2 in the wizard to set Tab Visiblity by profile (or you may grant this permission via Permission sets separately).
Continue to Step 3 and select which "Custom Apps" should include the tab, and check the box at the bottom if you want to "Append tab to users' existing personal customizations".
Optionally, later go to specific Custom App's navigation setup to change the sort order of where your new tab will appear, as by default it will be appended as the last tab in the App.
To test your customizations, go the the App and verify the tab is visible and working similar to what is shown below.


